
The Hermit Crab
-NOMADIC LIVING IDEAS TO KEEP IT SIMPLE-


The Upper Structure Construction
To build the walls and the roof on top of this frame, I followed a very simple principle. The whole structure is basically plywood sandwiched between an aluminum skeleton. The aluminum is held together, as well as held to the wood, by simple locknuts.

Picture 1: Inside view of the acrylic window (the back of the Crab)

Picture 2: Inside view of the front entrance, with the tarp opened up
Plywood
-
Two plywood panels, dimensions of around 40cm (15 inches) x 2m (79 inches), and 4mm (5/32 inches) thickness. These will be the side walls.
-
A plywood panel of dimension 1m (40 inches) x 1.03m (41 inches), also 4mm (5/32 inches) thick. This will be the back panel, in which we will cut out the window, seen on the first picture. The only purpose of this frame is to allow the window to open, and seal the rain out when it's closed.
-
A plywood panel of dimension 1m (40 inches) x 40cm (15 inches), also 4mm (5/32 inches) thick. This will be the front panel, seen on the second picture.
-
Extra plywood (you'll probably have enough leftover scraps) to make the sides of the wheel fenders, seen on both pictures. This can also easily be made out of aluminum sheets.
-
Shelves can be made from leftover plywood, nice way to recycle that stuff.
Aluminum Angle Bars
The angle bars don't have to be symmetrical like in this picture: they can be L-shaped too, that's fine. Most of mine were L-shaped and some were symmetrical.
-
Four angle bars, 2m long (80 inches). Quite solid, because these will be the outer frame of the plywood walls.
-
Three angle bars, 1m long (40 inches). Quite solid, these will the the frame supporting the top and bottom of the front panel (seen on picture 2), as well as the bottom of the back panel (seen on picture 1)
-
About 8m (26 feet) worth of thinner angle bars, these will be cut and used as reinforcement against the inside of the walls. As you can see on both pictures, there are two vertical bars on each wall, and two angle at 45° around the wheels. There's also one on the outside of each corner of the Crab. That makes a total of 8 bars inside, and 4 outside. Each bar being around 50cm (20 inches), that makes a total of 6 meters (20 feet) worth of angle bars. 8 meters (26 feet) is to be extra sure and to have leftovers for later.
-
Around 5m (16 feet) worth of even thinner angle bars, these will be the frame around and through the acrylic window, seen on picture 1.
-
Again, leftover angle bars can be used to make shelves.
Aluminum Pipes
All aluminum pipes used to make the upper structure are 2cm diameter (3/4 inches). The rim should be pretty thick, like the one in the picture. Here are the lengths:
-
Two pipes with a length of 2.5 meters (98 inches) to make the arcs supporting the beams. If you can't find pipes that long in the stores, you can go for two pipes half the length and connect them togehter, but it'll be a little more complicated.
-
About 8m (26 feet) worth of pipes for the ceiling beams. There are 5 ceiling beams, ranging from 1.2 meters (4 feet) to about 1.5 meters (5 feet), so 8 meters (26 feet) is a safe bet.
Nuts and Bolts
-
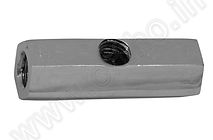
I used at least 250 locknuts (the ones with nylon inserts to prevent them from coming loose with vibration). The standard ones used in the Crab are sized M4. This must be a European size, but basically I took the smallest nylon-insert locknuts they had in the hardware store.
-
As many bolts as locknuts. The length I used the most was 2cm (3/4 inch), and I also used quite a few 1cm (0.4 inches), and a little less 3cm (1.18 inches) long bolts.
Acrylic Panel, also know as Plexiglas
This is the panel used to make the window. Dimensions are 1 x 1 meter (40 x 40 inches), thickness is 4 mm (1/8th inch)
Rubber Washers
Necessary to bolt the acrylic panels to the metal frame. Without them, as soon as the sun shines, the metal expands more than the acrylic, making it crack. Get at least 20, they'll come in handy.
Plastic Handle Bolts
These are bolts that end with a hand-friendly plastic handle. That's my way of closing the window. You'll need 4 if you want a two-articulation window, and 2 if a single-articulation window is enough for you, where only the upper half of the window can open.
Hinges
-
A total of 14 quite small simple hinges, similar to the one in the picture. Four are for attaching the inclined front wall to the frame, four are for attaching the inclined back wall to the frame, three are for the window's bottom articulation and three are for the window's middle articulation. It's not necessary to have a window that can full open, so if you choose not to, you can knock three hinges off your list.
Liquid Thread Locker
I love this stuff so much I'm tempted to sniff it in the morning. It acts the same way as the nylon-inserts found in the locknuts mentioned earlier. We use these locknuts wherever we can, but there are some situations where for some reason, whatever you're screwing doesn't have these nylon inserts and you don't want it to slip out with vibration. Liquid thread locker does the job (don't get the heavy duty permanent one, get the lighter duty one). But don't use liquid thread locker where you could use a nylon-insert locknut: locknuts are much cheapier, so you'd be wasting time a money.
Ingredients
These are all the parts you need to make upper structure. You don't need to use the exact same dimensions, as long your dimensions are coherent with eachother.


Making the Arcs
The arcs are simply 2.5 meter (98 inch) pipes bent into a nice arc that should have a bottom width of 1 meter (40 inches). The last 40cm (16 inches) at both ends should be straight and parallel because they will frame the rectangular plywood panel we talked about earlier. Here's a nice method for bending a pipe relatively neatly without any tools in five easy steps.
-
Tape one end of the pipe tightly shut.
-
Use a funnel to fill the pipe with sand if you live by the beach, or with salt if you live in the mountains (the cheap kind they use to melt snow). Pack it in as tight as you can by hammer it down with a thinner pipe. This will prevent the pipe from kinking and breaking when you bend it.
-
Once it is very tight, tape the other end shut.
-
Bend it with anything you have. I have an old bicycle wheel and two feet. Make sure you don't bend it against anything too angled. It doesn't take a lot of strength, but feel free to use a friend or a neighbor.
-
Take the tape off and pour the salt back in the bag or pour the sand back on the beach for future use.

Steps one and three

Step two (I live in the mountains)

Step four (I took this picture with my mouth)

Please don't criticize the niceness of my arc
Attaching the Arcs to the Bottom Frame
We're going to turn these arcs into walls before attaching them to the frame. This means bolting on horizontal aluminum angle bars as well as the plywood panels.
For the Front Arc
I drilled-and-bolted the bottom of the front arc to one of my 1 meter (40 inch) aluminum angled bars, and did the same thing 40cm (16 inches) higher with an identical prallel aluminum angled bar. This makes a sort of frame for our plywood panel of dimension 1m (40 inches) x 40cm (15 inches). I bolted the plywood panel on the frame to make something like the left-hand photo.
For the Back Arc
I only drilled-and-bolted a 1 meter (40 inch) aluminum angled bar to the bottom of the arc, because I wanted the whole window to be able to open. If you don't need the whole window to open, you can put the identical parallel angled bar on the back wall as well. I used the 1m (40 inches) x 1.03m (41 inches) plywood panel for the back arc: I cut a window through it with the jigsaw, leaving a wooden arc of around 10cm (4 inches) wide. as we can see on the bottom-right picture. I then bolted this wooden arc onto the aluminum arc, making a surface against which the window can close, making in rainproof. It would be easy to forget the whole wooden arc and just make the whole back wall one big window, but it would be an un-openable window. We'll talk about the window later on.
Once that's done, you can attach the front and back arcs-with-walls to the frame thanks to four hinges we spoke about earlier. You can more or less see them on the left-hand side photo. Make the space between the wall and the bottom frame as small as possible, because you'll have to fill it up with silicone later on. The beams aren't holding the arcs together yet, so just let them lay flat.

The front wall and arc, hinged on to the bottom frame

The back arc, hinged on to the bottom frame
Attaching the Beams to the Arcs
You're going to have to be creative for this one. I'll show you how I did it, but it was a lot of work so I'm sure you can come up with a better way.
right place, and screw a bigger bolt (a bolt corrseponding to the threaded socket) right through the hole. Here, I applied the liquid thread locker on the big bolt before screwing it in through the threaded socket. I also put washers that I bent for extra protection. I had to do all this 10 times, as there are 5 beams. Non of this is necessary though, as I'm sure you can find a simpler way.
The beam length is up to you, depending on your height. I made the Crab as aerodynamic as I could, as long as I can still have the comfort of sitting up straight. Start with the center beam: the shorter it is, the more aerodynamic and sleek the Crab will be, but also the less height you'll have inside. My center beam was around 1m20 (47 inches) long. The four other beams don't need to be precise: just measure where you want to put them and cut them to that length.
Basically I took a threaded socket, drilled a hole on top and through it, drilled a corresponding hole through the beam, slid the socket into the beam and put a small bolt & nut through both holes (you can see the bolt & nut sticking out in the blurry upper-right picture). Now that the socket is attached in the inside of the beam, all I needed to do was drill a hole through the arce at the
Threaded socket with a hole on top


Making the Side Walls
This part's really fun, especially if you played K'NEX when you were young(er). I won't go into too much details, because you can pretty much do this however you like, and anything you do with common sense will work fine. I'll just tell you about the general construction.
I cut out the plywood into a trapezoid, according to the angle of the front and back walls we just made. I framed the top and bottom of that trapezoid with those 2 meter (79 inch) aluminum angle bars that I had a total of four of (two for each trapezoid). In the corners or the trapezoid, instead of sawing the aluminum and bars to the right

Remember middle-school math class? This is a trapezoid.
length, I did something kind of special to make the construction follow this rainproof principle a little better: as you can see in the middle of this photo, I cut the angle bar only partly, allowing me to bend the other part, making a really nice corner that only allows water to drip out.
That was for the top and bottom of the trapezoid. For the sides, I put the thinner type of aluminum angle bar, so that each corner of the Crab is protection from rain and shock by an angle bar (you can see it in the same photo, it's directly above the corner we were talking about before).
RAINPROOF CONSTRUCTION
Now is the time I must tell you something about construction to prevent you from making the same mistake as me: the best way to keep the water out isn't to make everything airtight. It's to make an overlapping tile-style construction, like the tiles on your roof. If you don't allow the rain to drip in, only allowing it to drip out, your construction doesn't need to be airtight, it doesn't even need silicone in the joints. It's all about making each element (tarp, aluminum angle bar, plywood) overlap the one below it from the outside. In other words, in every step of the construction you should ask yourself: where will the rainwater drip?

The Inside of the Side Walls


At this point we should already have the 10cm (4 inch) wide aluminum sheet that goes along the sides and around the wheels (this was described in the "Main Frame" chapter). To close the wheel opening, I simply cut out half-circle shapes into plywood according to a pencil tracing I did, and bolt those on with corner pieces. I put to reinforcement angle bars going out from each wheel (you can see all four in the left-hand picture), bolted on to the top and bottom aluminum angle bars, so the plywood is snugly sandwiched between these bars. These reinforce the walls and make a triangle shape, helping to support the wheel pressure. The four other supporting bars are completely vertical (perpendicular to the main frame), and have the purpose of supporting the adjustable pegs. We'll get to that in the next chapter. As for the shelves, they're nothing more than aluminum angle bars bent at 90° with a corresponding plywood rectangle. They really come in handy to live comfortably.
The Acrylic Windows
I simply traced the shape of the wooden arc onto the 1 x 1 meter (40 x 40 inch) acrylic glass, and cut it out with a jig saw. I then cut horizontally 40 cm (16 inches) from the bottom to make the window articulation. Once I had my two acrylic panels, I framed them with the 5 meters (16 feet) worth of the thinnest angle bars, mentioned in the ingredients. To frame, as we can see on the right-hand photo, I cut a small V-shape into the side of the angle bar, allowing me to bend the bar, which closes the V. I did this many times, and bit by bit, the whole window was framed. I then hinged both framed acrylic panels together, and hinged that to the back of the Crab. That makes a window that can opened on two levels! One thing you should note that is every time you put a bolt in through the acrylic, you should make the hole slightly bigger than the bolt, and put a rubber washer as mentioned in the ingredients. This will prevent the acrylic from cracking when the aluminum bars expand with heat. I learnt this the hard way.
To open and close the window, I drilled four holes through the wooden arc frame and put plastic handle bolts (2 for the top window, 2 for the bottom window). We can see the 2 top plastic handle bolts picture below: I screw them off to open the window.

